DownLoad JellyFish.ZIP
(24K).
Copy the scene file
'Jellyfish.max' into your MAX/Scenes folder. Make
sure the map file 'Seashor.jpg' is in your
MAX/Maps folder, and if not, substitute a similar
bitmap file.
This demonstration
will show how the Follow Constraint can be used
in two different ways – to control a
HyperMatter object’s Global motion through
the World Space, and also to locally deform the
object itself. We will also see how to optimise a
HyperMatter scene once we are satisfied with the
animation we have made by making a record of the
deformation.
To begin with, we will
load in a scene file consisting of a jellyfish
mesh object and a dummy helper object, which has
already been animated in a jerky, upward
trajectory. We’re going to make the
jellyfish follow the dummy object. We first
Solidify the jellyfish at Object level, setting
the resolution of the HyperMatter mesh to 4, and
the fit direction to X. As the scene is meant to
be underwater, the effects of gravity will be
reduced, so we set it to half the default, -50.
The object is also a little too soft at the
default value, so go to the Substance editor, and
change the following values:
Set the Dimension
to 100, Elasticity to 1.5, and Damping to 2.
Now to apply the
Follow Constraint, we select the centre cubes
from the HyperMatter mesh and make them a part
named ‘Core’. We select Follow from the
Constraints panel, and choose the dummy as the
follow object. Choose ‘Whole Part’ as
the follow option, as this will allow the
jellyfish body to move around the dummy under its
own momentum.
Select ‘Whole
Part’ from the Follow options panel.
Now when we hit Play,
the jellyfish rises upwards with the dummy,
although it’s a little out of control,
resembling more a puppet on a string than a
conscious creature. We need to make the jellyfish
look as though it is controlling it’s own
movement, so the next control needs to deform the
object relative to it’s local motion.
We can make the
jellyfish expand and contract and stay relatively
upright by using another Follow Constraint. We
unhide a small circle, named RimGuide which is
linked to the dummy object. It has been
key-framed to change scale in waves, and is
linked to the dummy object in order to follow
it’s movements exactly.
|
We select a part
around the ‘waist’ of the jellyfish,
and name it ‘Rim’. Now when we apply a
Follow Constraint to this part, select ‘Each
Point’ as we want the part to be completely
constrained in this case.
When we hit Play this
time, the jellyfish swims to the surface with far
more realism.
To quickly make a
shoal of jellyfish, simply select the jellyfish,
dummy and RimGuide, and Shift-clone them, to make
about 5 or 6 copies, then arrange them in a
pleasing configuration. Now select each jellyfish
in turn, and rotate it in the Top View around the
Z axis, so that each one has a different
orientation. This will ensure that although they
all follow the same motion path, their local
behaviour will be slightly different. Of course,
you could also edit the dummy object’s keys
to dramatically change the course of each
object’s swimming behaviour.
Once you are happy
with the motion of each jellyfish, try making a
Record object of each one, which will
dramatically improve performance, as it converts
your HyperMatter objects into standard MAX mesh
objects. Simply select the key-frame interval you
want, hit ‘Auto-Create Keys’, and
HyperMatter will generate a series of morph
targets from your HyperMatter animation, allowing
you to apply further deformation modifiers etc to
your objects.
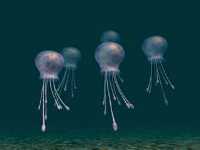
To download an AVI of
this scene (1.9 MB), click on the image above.


|